 MathCS.org - Android
First Android App
java -> android -> first app ...At this point your programming environment is setup, tested, and working - time for your first application written from scratch: the "Hello Android" app (of course). The principles here apply to most projects.
- Start Eclipse
- Select "File | New | Project" and pick "Android project"
- Fill in the Project name (FirstApp) and select a Build Target (Android 1.5 would work nicely). As properties, type in an Application name you would like to see in the program list on your device (First Android App would be fine) and pick a consistent Package name (in my case org.mathcs.firstapp). Leave the Create Activity box checked and make sure the activity name is FirstApp.
- Click finish to create the framework for your first application
A number of folder and files are now created for you:
src/ folder to contain your source code file(s). In our case there will be a single file FirstApp.java, contained in a package named org.mathcs.firstapp gen/ contains automatically generated files such as R.java and packages you should not edit manually assets/ asset folders, empty right now res/ resources folders with at least three sub-folders: res/drawable/ contains resources such as icons res/layout/ contains the master layout file main.xml res/values/ contains a file named strings.xml for String resources AndroidManifest.xml file that defines your programs capabilities and required permissions default.properties defines the application's build target and other options and properties
Eclipse together with the Android plugin defines everything needed to run this application. Right-click on the main project folder and select "Run as ... | Android Application" or create a customized "Run Configuration" (see Creating a Launch Configuration for more information).
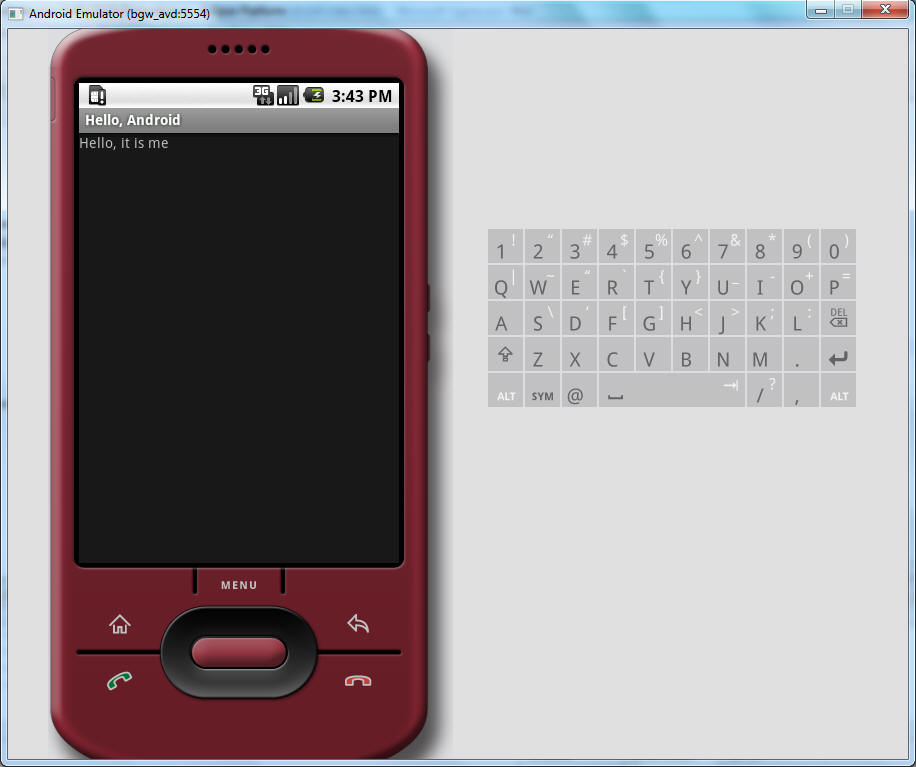
If all goes well, an Android emulator will start up if necessary (of the required version) and execute your program. If you plugged an Android device into your computer before picking "run", your application will get installed on the plugged-in device instead and run on the device (see below). Once installed, you can re-run your program on your device later at any time, or choose to uninstall it from the device: it will be a real Android program, complete with its own icon and everything - that does very little, however.
In fact, the application will display the text "Hello World, FirstApp". To find out what's going we will look at the main source code file in the src/ folder. It shows:
package org.mathcs.firstapp;

import android.app.Activity;
import android.os.Bundle;

public class FirstApp extends Activity
{
	/** Called when the activity is first created. */
	@Override
	public void onCreate(Bundle savedInstanceState)
	{
		super.onCreate(savedInstanceState);
		setContentView(R.layout.main);
	}
}
The method onCreate is called when the application first starts - more on that later. It calls the onCreate function of the parent class, then sets the view to the main layout as defined in the XML layout file main.xml. We will explain the details later, but for now expand the res/layout/main.xml, which is the resource referenced by R.layout.main.
- if you double-click on main.xml, a (very sophisticated) layout editor opens that we will (also) discuss later, so close that view
- if you right-click on main.xml, you can select "Open with ..." and open the file with a generic XML editor
As a generic XML file the main.xml file looks like:
<?xml version="1.0" encoding="utf-8"?>
<LinearLayout xmlns:android="http://schemas.android.com/apk/res/android"
    android:orientation="vertical"
    android:layout_width="fill_parent"
    android:layout_height="fill_parent"
    >
<TextView
    android:layout_width="fill_parent"
    android:layout_height="wrap_content"
    android:text="@string/hello"
    />
</LinearLayout>
It defines a LinearLayout, inside of which is a TextView. The text for the TextView, in turn, comes from a String resource named hello. You can find that resource by opening res/values/strings.xml (via right-click to open with a generic XML editor):
<?xml version="1.0" encoding="utf-8"?>
<resources>
    <string name="hello">Hello World, FirstApp!</string>
    <string name="app_name">First Android App</string>
</resources>
The String resource named hello contains the text that is show in the content view of our application. Change it to another value and re-run the application.
Running a program on the Developer's G1
All Android applications must be digitally signed before the system will install them on an actual device. There are two ways to do this: with a debug key (for immediate testing) or with a private key (for application distribution).
The Eclipse ADT plugin helps you get started quickly by signing your .apk files with a debug key, prior to installing them on an emulator or development device. This means that you can quickly run your application from Eclipse without having to generate your own private key. No specific action on your part is needed. However, if you intend to publish your application, perhap later, you must sign the application with your own private key, rather than the debug key generated by the SDK tools.
Read Signing Your Applications for a thorough guide to application signing on Android and what it means to you as an Android application developer.
With a T-mobile G1 or Android Dev Phone 1, you can develop and debug your Android applications just as you would on the emulator. There are just a few things to do before you can start.
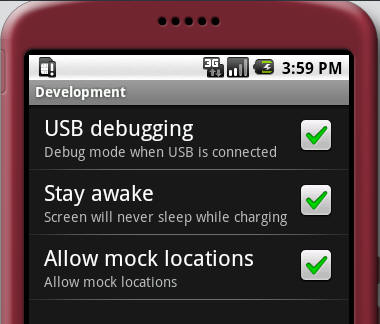
- Turn on "USB Debugging" on your device: On the device, go to the home screen, press
MENU,
select Settings > Applications > Development, then enable
USB debugging.
- Connect your device to your PC - make sure you have the USB driver installed.
-
You can verify that your device is connected by executing
adb devicesfrom your SDK tools/ directory. If connected, you'll see the device name listed as a "device."If using Eclipse, select run or debug as usual.
- If the emulator is closed and your phone is connected, your program will be installed and executed automatically on your phone
- If your emulator is open and your phone is connected, you will be presented with a Device Chooser dialog that lists the available emulator(s) and connected device(s) - select the device to install and run the application there.
- If your phone is not connected, your program will run in the emulator (which is started if necessary)
Make sure to check your device - it should run your program. It also will have installed it on your device so you can run it from your applications when disconnected, just as a real program.
When you update your program and run it again, the updated version will override your previous version on your device (virtual or real). All programs installed on your virtual device, as well as any device configurations, will remain installed when you close the emulator.