|
|
iLabs - HELP |
iLabs helps you keep notes during your science lab and to collect all the information you need to create a great lab report. Once you are done with your lab notes and have recorded all your data, including any pictures, you can send the data to yourself so you can edit it on your desktop (most conveniently) and turn it into the perfect lab report. Note that you must have a valid Internet connection to use this app.

Select a course from the left-most list of available courses by tapping on the course name, e.g. DEMO 101.
Note: If no courses are available, you might not have an active Internet connection. If you are certain that you can access the Internet, you may have inadvertently set an invalid "base address". In that case, go to Settings, tap the "Host Name with Base URL" category and enter the default base URL http://www.mathcs.org/iLabs/ (including the slash at the end).
After you select a course, you will see a list of labs available for that course. Tap your desired lab, such as Lab 1: Measurement and Density, then click the "Cloud Load" button to load that lab. If this is the first time using iLabs, you will need to enter a username and email address before you can load a lab. Enter the required information, then pick lab 1 for the Demo 101 class again and load it.
Settings
You can access the Settings screen from the menu (on the top-right corner) to set the following options:
back to table of content
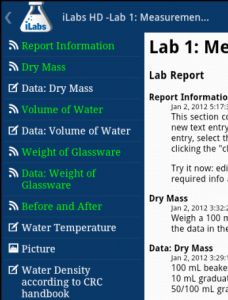
If a lab loads successfully, you will see the information pertaining to that lab divided into four tabs:

- Safety
- Contains safety information for a lab. You should familiarize yourself with every entry listed in this category.
- Prelab
- Contains prelab information and quiz questions you should complete before creating your report.
- Data
- This is where you enter your own information or pictures regarding the lab your are working on. You may find some categories already specified, which you will need to edit, and you can add additional information as necessary.
- Resources
- Contains additional resources for the selected lab. You should check this category if you have any additional questions regarding the lab you are working on.
Each of these categories consists of a list of topics to select from on the left and information about the selected topic, usually in the space on the right. Each topic in the list is of a particular type, indicated by its icon. Not all types might be represented in every tab, and some tabs could be empty.
Each entry initially appears in white in the left list. If you visited an item, it will turn green. Quizzes will only turn green after you answer them correctly. Text entries will turn light-green after you edit them.
Note that some topics may be listed prefaced with a star *. If so, that entry is mandatory: you must tap it and review the corresponding information before you can add or edit your report.
You can also tap the "Add Photo" button
![]() to add a new photo, the "Add Text"
button
to add a new photo, the "Add Text"
button ![]() to add a new text topic, or the "Cloud Submit" button
to add a new text topic, or the "Cloud Submit" button
![]() to submit your
finished report data. Moreover, you can access an additional menu that allows you
to delete an entry, delete the entire report, or get additional help.
to submit your
finished report data. Moreover, you can access an additional menu that allows you
to delete an entry, delete the entire report, or get additional help.
back to table of content
 The
Report tab is the main feature of iLabs. After you visit all mandatory items in
the Safety and Prelab tab, you can work on your Report. You can actually view
this information any time, but you can only modify it after visiting all
mandatory items.
The
Report tab is the main feature of iLabs. After you visit all mandatory items in
the Safety and Prelab tab, you can work on your Report. You can actually view
this information any time, but you can only modify it after visiting all
mandatory items.
On the left is a list of items, which can be either URL-like information, text entries, or pictures. On the right is your report, consisting of the information contained in all items in the list in the order listed.You should read through the URL entries, which can not be edited, and they as usual will turn green after you visit them. Each time you tap an item in the list, the corresponding info in the report on the right will highlight.
Text items can be edited in their own dialog box by long-tapping on them. Each entry has a title (mandatory) and some data. Note: If you know how, you could insert HTML formatting tags, but be careful to insert only proper HTML.(If you edit an entry, the original text will be saved in a special file.)
To add a new text item, click the "add text" item
![]() on the top. Provide a title
and some text, then tap "okay". The new item will be inserted immediately after
the currently selected item, if any, or at the end of the list.
on the top. Provide a title
and some text, then tap "okay". The new item will be inserted immediately after
the currently selected item, if any, or at the end of the list.
To add a new picture, tap the "add photo" item
![]() on the top. The standarrd
camera app will appear from where you could choose to take a picure or cancel
the operation. Photos are useful to capture your experimental setup, or to make
a copy of some drawing or sketch. If you do insert a new photo, it will be added
immediately after the currently selected item in the list, if any, or
at the end of the list.Each photo must have a title, which you can edit any time.
on the top. The standarrd
camera app will appear from where you could choose to take a picure or cancel
the operation. Photos are useful to capture your experimental setup, or to make
a copy of some drawing or sketch. If you do insert a new photo, it will be added
immediately after the currently selected item in the list, if any, or
at the end of the list.Each photo must have a title, which you can edit any time.
To delete an entry, first highlight it in the list, then select "Delete Item" from the menu. If you confirm, the selected item will be removed from your report (a copy of the deleted item is saved in a special file).
When your report is complete and you added all the information and pictures
you will need to create your final report, you can click on the "Cloud Submit"
button
![]() . An email message will be prepared that should open in your default email
app. It contains some text, a recipient (the email address you specified in
Settings), and a number of attachments:
. An email message will be prepared that should open in your default email
app. It contains some text, a recipient (the email address you specified in
Settings), and a number of attachments:
Note that a copy of your report will also be emailed to an address associated with the lab. You could edit this address or delete it, but if you do, your instructor will not receive a copy of your report data.
back to table of content
You can easily create your own content for iLabs which requires some technical expertise and you need access to a web server to store your labs. Alternatively, you could email your desired lab information to "wachsmut@shu.edu" to have your lab checked for inclusion in the official iLabs list of courses/labs. If your lab is suitable, you will receive an estimate for how much it would cost to add your lab to iLabs, a proposed timeline and some general information. Generally it will take about 2 - 3 weeks to prepare a new lab. To learn more about creating your own lab, please click here.
back to table of content
Bert G. Wachsmuth (c) 2011